Making A Do-It-Yourself Atlas or McGlashen Stone
(for this document click on any of the images to load a larger version of it in a new window)
Table of Contents:
Introduction and Resources:
There is a long tradition behind stone lifting. It's older than most other forms of weighlifting for the obvious reason that stones are generally very very old (at least in the scheme of human history). One of the more famous events in the history of strength athletics involves spherical stones which are lifted, carried, and loaded onto various objects. These are generally known as the McGlashen stones, or more recently -- the Atlas Stones.
Chances are fairly good that if you're reading this article -- then you are already familiar with them.
There are many ways of making spherical stones, from actually shaping them out of granite, to molding concrete, and this page deals with the latter method.
I reccomend that before you make your own stone(s) you do your research, and take a look at all of the other pages on the web that deal with this topic. I did, and it was incredibly helpful.
The best web resouces on the subject I have found were...
Web Pages:
Jason Keene's "This Old Atlas Stone" - I found this to be incredibly useful and well made.
the Bodyresults' How to Make an Atlas Stone page
Messageboards (try a search for "stones" on these boards):
The Anvil -- A great strongman board and a source of much information on making stones. Be sure to look around here.
The Old School Training Board -- Plenty of unusual training info. Has some info on stonemaking.
The Boiler Room Strongman Training Forum -- Lots of information on making and training with the stones.
Read every word, and learn as much as you can from what other people have done. The more you know, the easier the process will be. Those resources were quite helpful to me, and they will serve you well. It will only actually take a few hours of your time to make a stone which will last a lifetime.
The Basic Principle:
Making a concrete stone generally involves the following steps:
- Get a hollow container with an inside shaped like a sphere.
- Fill the container with concrete.
- When the concrete is dry -- get the stone out of the container.
In this method the container is going to be made out of Plaster of Paris, formed around an inflatable sphere (also known as a ball). The ball is removed from the dried Plaster of Paris, leaving the perfect mold for stonemaking. The finished stone will be removed from the mold by breaking it out. Not graceful -- but fun. (Besides... you get to say that when you made your stone you broke the mold.)
Materials You May Need:
Depending on the specific method you use, and what you have access to, you may or may not need all of these things. This is a list of the things I did use, some things I should have used, and a few things you might need to use.
How Large of a Stone?
If you want to calculate the volume of a sphere you could use a snazzy calculator like this one which will calculate volume or circumference for said volume, or do it yourself using the following equation fo volume:
4 * Pi * (radius)^3


-------------------


         3
...or...
4/3 * PI * (radius * radius * radius)
... in english that would be saying that volume is equal to one third of four times the side to the cube (HTML is generally not friendly for doing math, but one of those versions should make sense).
Chances are you just want a quick chart that will give you an idea so...
Here's something I've taken directly from Jason Keene's site:
Below are a list of weights for circumferences given the weight cured cement as 140 lbs per cubic foot:

      Circumference      Weight
      54"                216 lbs
      56"                240 lbs
      58"                267 lbs
      60"                295 lbs
      62"                326 lbs
Okay, so now you know how to come up with the weight of stone you want... but what if you want to pit yourself against the greats? Here are a few peices of information that I've gleaned:
- The Weights for the 5 Stones in World's Strongest Man are 245lbs - 365lbs
- The Weights for the McGlashen stones are apparently 198lbs(90kg) - 352 lbs (160 kg)
... although in '94 the heaviest McGlashen stone was apparently 300 lbs.
- I gather that it was a 300lb stone which was first #5 succesfully loaded in competition by Bill Kazmaier.
- Sometimes weights are added to make the stones heavier although they are the same size.
- The World Record Stone that Jouko Ahola loaded weighed 474lbs
On to..
THE PROCESS
|
|
|
|
|
Day 1: Making the Mold
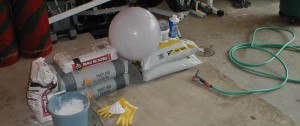
Based on previous web pages which outlined Stone Making, I figured I was going to need a ball that was inflated to around 55 Inches in diameter in order to make a 220lb stone (around the same weight as the first Atlas stone). I used one of those "marble play balls" you can get at Canadian Tire.
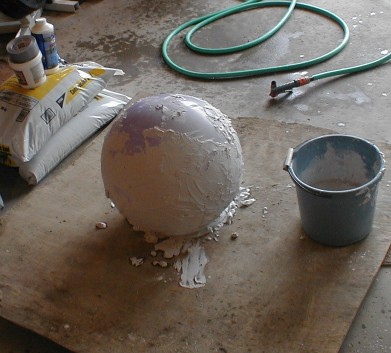
I began building the mold by throwing down a glop of plaster on which the ball could rest as I built up the mold around it (inflation hole up, of course). The plaster was easy to work with, as I mixed it in small batches.
It's a good idea to have a bucket of water handy for cleaning up while you're still in the work area.
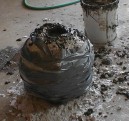
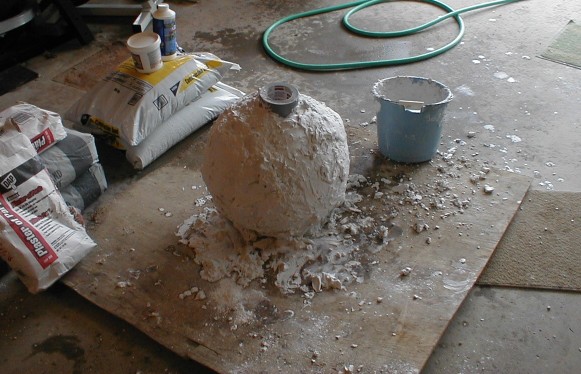
When I got to the top. I threw the roll of duct tape on to maintain a space for filling the mold.
It was somewhere during this process that I realised how foolish I had been to use such a large board (and such a warped one). Disposable -- yes. Good Idea -- no ... as every time I stepped on one end of it it would change shape slightly which is not at all good when you have drying plaster of paris which is bonded to it. I ended up having to do a strange almost "Sumo - Good Morning with Plaster Bucket". This wasn't supposed to be a workout in itself!
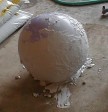
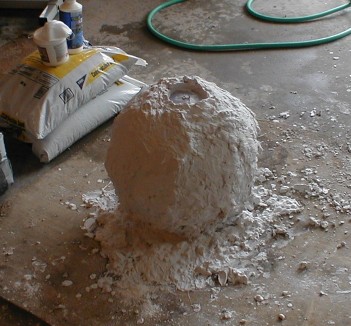
After I was finished the ball was acutally steaming. Plaster of Paris gets quite hot as it cures. The steam wasn't caught by my camera, but I assure you that in that last picture the large, plaster sphere is actually steaming like some kind of alien pod in a b-grade science fiction movie.
Wait at least a day before deflating the ball and removing it. Pull the plug if it has one, and push down on it. Once it's deflated enough you can reach in and wring the air out.
Then leave the mold for another day to fully cure. I took the ball out a little too soon (after five or six hours -- I wanted to allow the mold to cure on the inside as well) and my mold cracked a bit (from stepping on the board). I somehow thought that I should fix the cracks by rubbing plaster on the inside, thus creating an area of rough plaster that would come back to haunt me later... |
|
 |
|
|
 |
|
|
 |
|
|
|
|
|
|
DAY 2: Filling the Mold
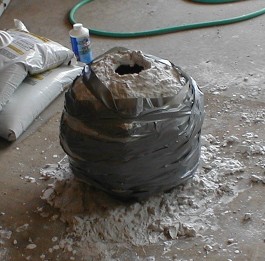
I added Duct tape to the mold. I realise now that this was unnecessary as the mold is actually surprisingly strong. Just as everyone seems to I used way more plaster than I needed to. I have since experimented with using plaster bandages in order to make a thinner and lighter mold that can be set up in sand to prevent warping... more on that later.
I mixed the concrete at about 1 bag sand:1 bag concrete giving me a 3:4 ratio. It's proven to be quite strong, hasn't even chipped yet and it's been dropped onto concrete from a good height. I mixed the dry mix all together and then mixed the concrete in small batches. You'll have to be quick and consistent if you are going to do it this way -- and be sure to stir the filled mold to ensure consistency.
I filled it a bit at a time, stirring each new batch in. Next time -- I'm just going to rent the damn cement mixer as Jason Keen recommends on his page. You may think it's a frivolous expense (and you may be right) but mix one stone with elbow grease and you'll soon be renting that mixer on future stones. Using my hands to break up lumps was quite the grip workout (this cruel task could easily appear in a future book by John Brookfield). The funny part is that my forearm got such a good pump from breaking up the lumps, that I had trouble getting mt arms into the mold to pack down the cement.
It's at least worth the trouble to tap or in some way vibrate the stone while the concrete is wet -- it'll eliminate a lot of the bubbles and pits that can cause the ball to be structurally unsound, and create a rough surface. Stirring will help too.
One thing I noticed here -- the plaster of paris mold can be somewhat sharp if you are reaching into the mold to pack down cement, or stir it. If you are a big girly-man like me who doesn't like having his arms cut up by a mold. I recommend either smoothing it out before you start, or padding it with some concrete (this will likely happen over time anyways).
... and shave your arms if you're going to be foolishly sticking them in concrete. That stuff dries fast and is not designed to be kind -- you will not be seeing concrete in any women's magazine articles on "miracle skin treatments". |
|
|
|
|
|
|
 |
|
|
 |
|
|
|
|
|
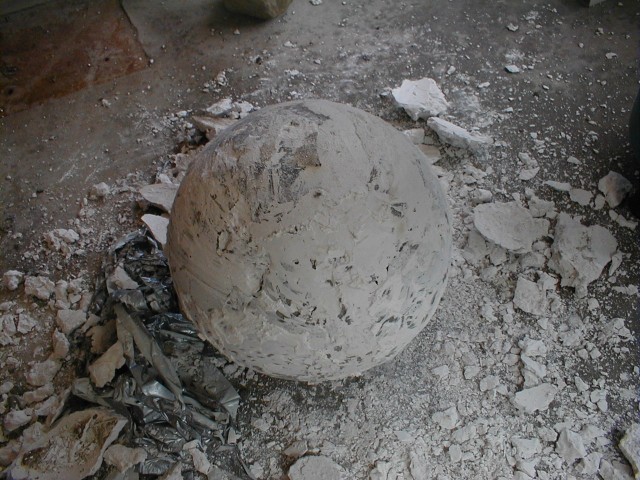
Day 7: The Moment of Truth
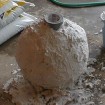
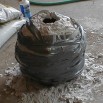
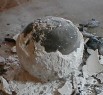
I left the mold for about 5 days and then began to crack away the plaster using a hammer and chisel...
.... At first I had no problems, but that rough area I had brilliantly created when fixing the cracks was more than a little stubborn .
NOTE: The lesson here? ... Fix cracks from the outside, keep the inside smooth, you can chisel away any additional concrete created by cracks, when the stone is done. Also -- use some kind of mold -release, or vegetable oil for good measure. A light coat will work, the rule of thumb is that the inside of the mold should be slick but no oil should "bead" on the surface.
I chiselled away as much as I could and then took a drill with a wire brush wheel on it to the stone. It worked like a charm (as you can see from this "before and after"...
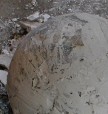 <----Before After-----> <----Before After----->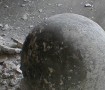
Note: I happen to think that the "After" pic is actually a really cool picture of an atlas stone being exhumed. |
|
|
|
|
 |
Results:
The finished stone was nice and smooth. I had gotten some concrete patcher to fix the inevitable pitting that would occur, however it really wasn't too bad, and the patching compound was gritty, which would make the stone rough. I wanted a smooth stone to offer a bit more of a challenge.
- Total time from start to finish: 1 week (+ a few days before heavy dropping to let the concrete cure)
- Total Expense: Around $90 CDN
- Bottom Line: The Plaster Mold technique is really easy and effective, offering the least expenditure of time and money while still yielding a fairly good stone for training.
ONWARD...
As I mentioned earlier in this article, I have been experimenting with alternate methods from the "Bigass Plaster of Paris Mold" technique which is so popular. There are also companies which rent and sell molds, while I haven't tried them myself I have heard that they aren't too bad.
I recently tried making a mold out of earth, and after this experiment I suspect that with the right quality of mud you could make an extremely good and inexpensive mold, with the only drawback being the difficulty in vibrating it (although you can jump on a mound of earth and it settles the concrete out quite nicely). A barrel full of sand could be used in conjunction with a plaster-bandage mold. The advantage to this method is that you could make a cheap FULL mold, supported on all sides, that could be rolled around when the concrete is wet. This is most likely going to be the next method I will use.
Perhaps If I ever find the time I will create a page outlining the results of my earth-mold experiment (a stone now affectionately called "Weird Alvin". It created what I wanted - a spherical stone which was small enough (around 150 lbs I would estimate) and with an irregular surface so that nearly anyone could lift it. Perfect for warming up and introducing others to stone-lifting.
With a bit of know-how a reusable fibreglass mold can be made using materials from a marine supply store. I haven't had the time to mess around with this one yet, but if I ever do -- you'll see it here.
###


 <----Before
